Attaching chambers and extensions manifolds
One cable and tube bundle (part number 9982-056) is used for each chamber and extension manifold.
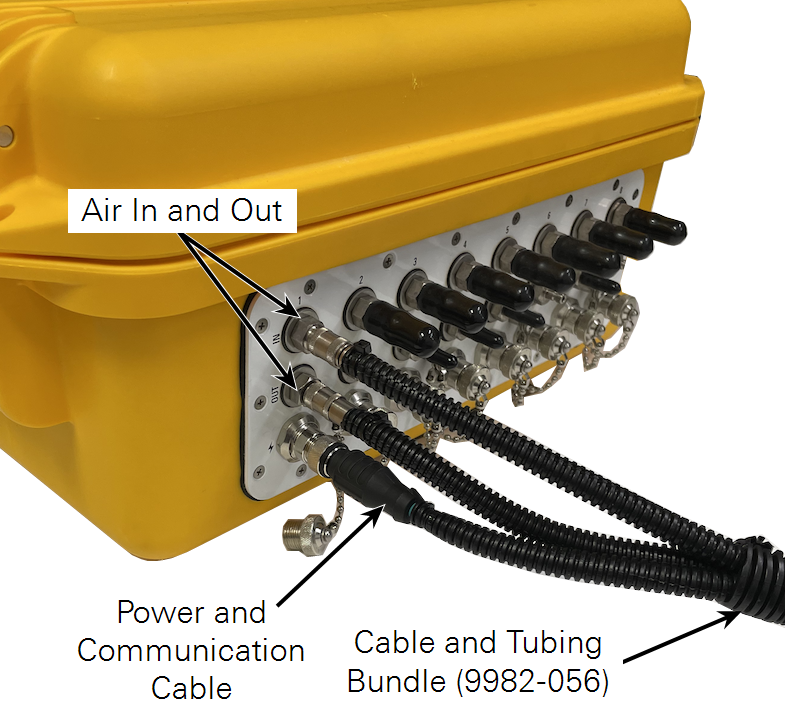
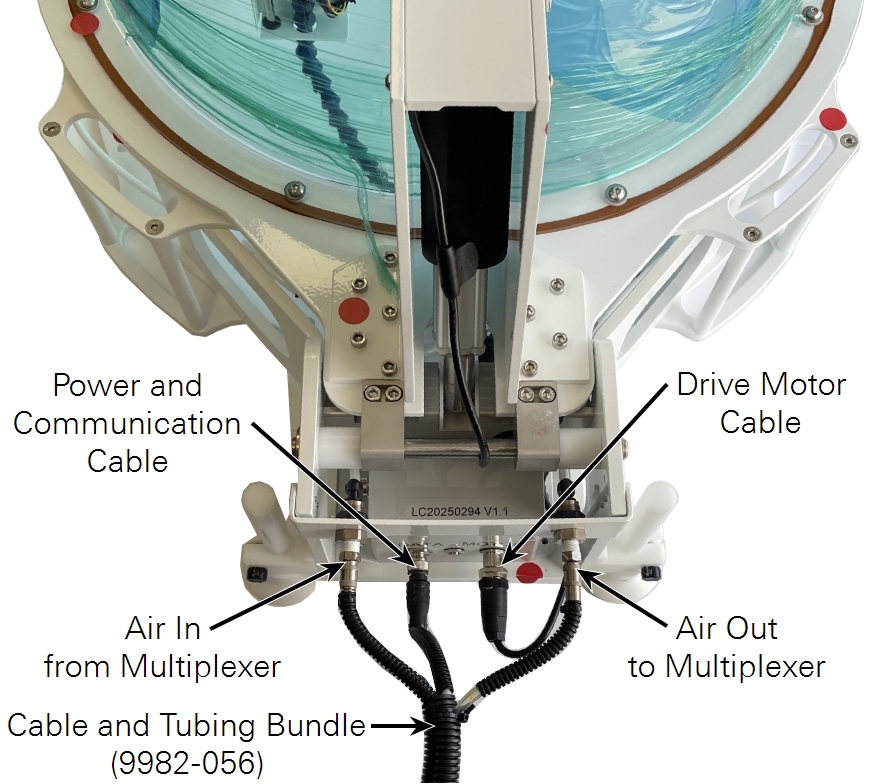
Chamber cables and tubes
Chambers attach to the LI-8250 Multiplexer and the 8250-01 Extension Manifold with the tube and cable bundle (part number 9982-056).

-
Attach the tubes and cable to the LI-8250 Multiplexer connection panel.
For the cables, align the key with the slot and then tighten until snug. Press and turn a little more until the connector is fully seated.
-
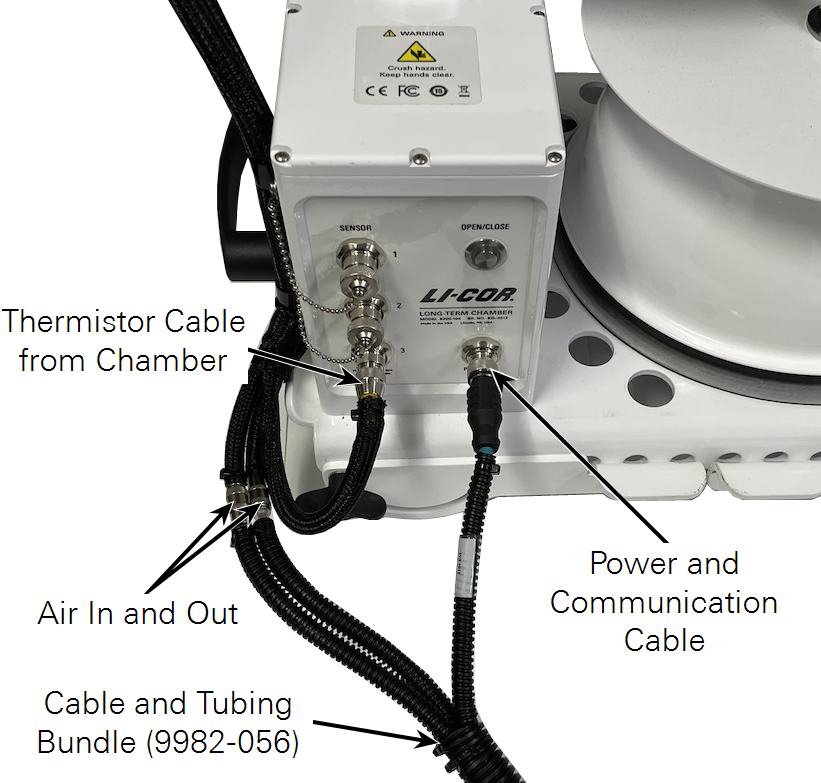
Attach the tubes and the cable to the chamber.
Be sure that tube and cable connections for each chamber and each extension manifold are made to the same port.
- For each Long-term Soil Chamber, connect the thermistor cable to a SENSOR port on the chamber. See Long-term Soil Chambers for more details.
- For each Automated Canopy Chamber, connect the motor cable to the connector labeled MOTOR. See Automated Canopy Chambers for more details.
- For flasks, see Connecting tubes and thermistors to flasks.
- For custom chambers, see Using custom chambers.
- For a profiling system, see Atmospheric profile measurements with the LI-8250 multiplexer system.
- For each Long-term Soil Chamber, connect the thermistor cable to a SENSOR port on the chamber. See Long-term Soil Chambers for more details.
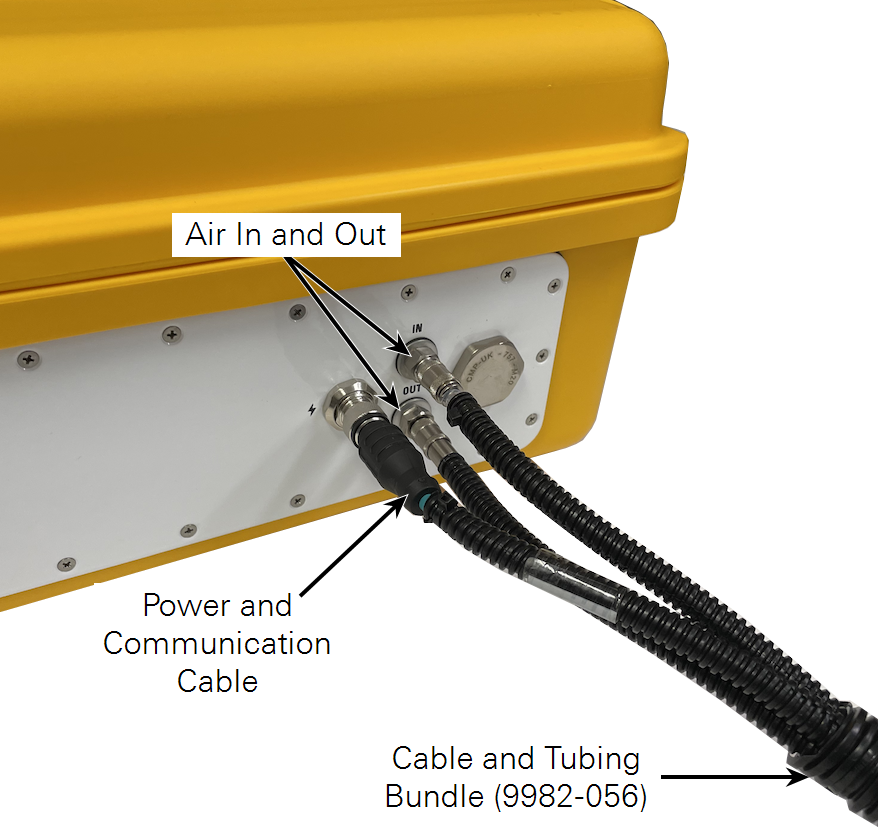
8250-01 Extension Manifold cable and tubes
Extension manifolds connect to the multiplexer with the cable and tube bundle (part number 9982-056). The multiplexer provides power to the extension manifold and to any Long-Term Chambers connected to the extension manifold (unless you are using the flask sampling kit). The multiplexer and extension manifold use quick-connect fittings for air tubes and connectors for the cables.

-
Attach the quick-connect fittings and the cable connector to the connection panel on the LI-8250.
Be sure that tube and cable connections for an extension manifold are made to the same port.
-
Attach the quick-connect fittings and cable to the Extension Manifold connection panel.
For the cables, align the key with the slot and then tighten until snug. Press and turn a little more until the connector is fully seated.