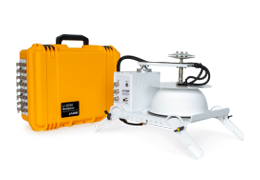
Long-term Soil Chambers
This section describes the steps you'll take to install 8200-104/C long-term soil chambers.
Installing Long-term Soil Chambers
Each long-term chamber occupies a single port on the multiplexer or extension manifold.
-
To install a soil collar, lay a piece of wood across the collar and hit the wood using a hammer or mallet to drive the collar into the soil. Aim to hit the wood near the collar and move the wood to high spots as needed. In hard or compacted soils, you may need to create a channel around the collar with a knife or trowel before installing the collar. Be sure the collar is level.
Tip: Want to make your own soil collar? See Making collars for LI-COR soil chambers.
-
Install the chamber and adjust the chamber orientation.
Orient the chamber so that most of the shadows from the structure are cast away from the collar area to prevent shading effects.

-
Each of the four legs should be adjusted so that the chamber sits evenly over the soil collar. To adjust a leg, loosen the knob and reposition the leg. Then tighten the knob securely.
-
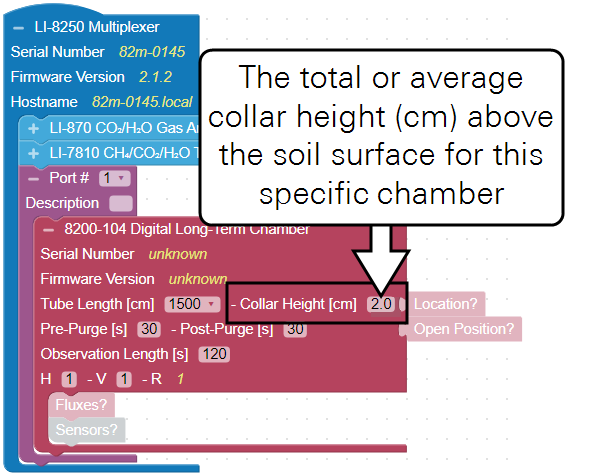
For the most accurate measurements, measure the collar height in at least 3 or 4 places and average these numbers. This is especially important when collars are installed in uneven or sloping soil.


Figure 3‑3. Collar height is the distance from the soil surface to the top of the chamber base plate. In sloped soil, it should be the average of several measurements. -
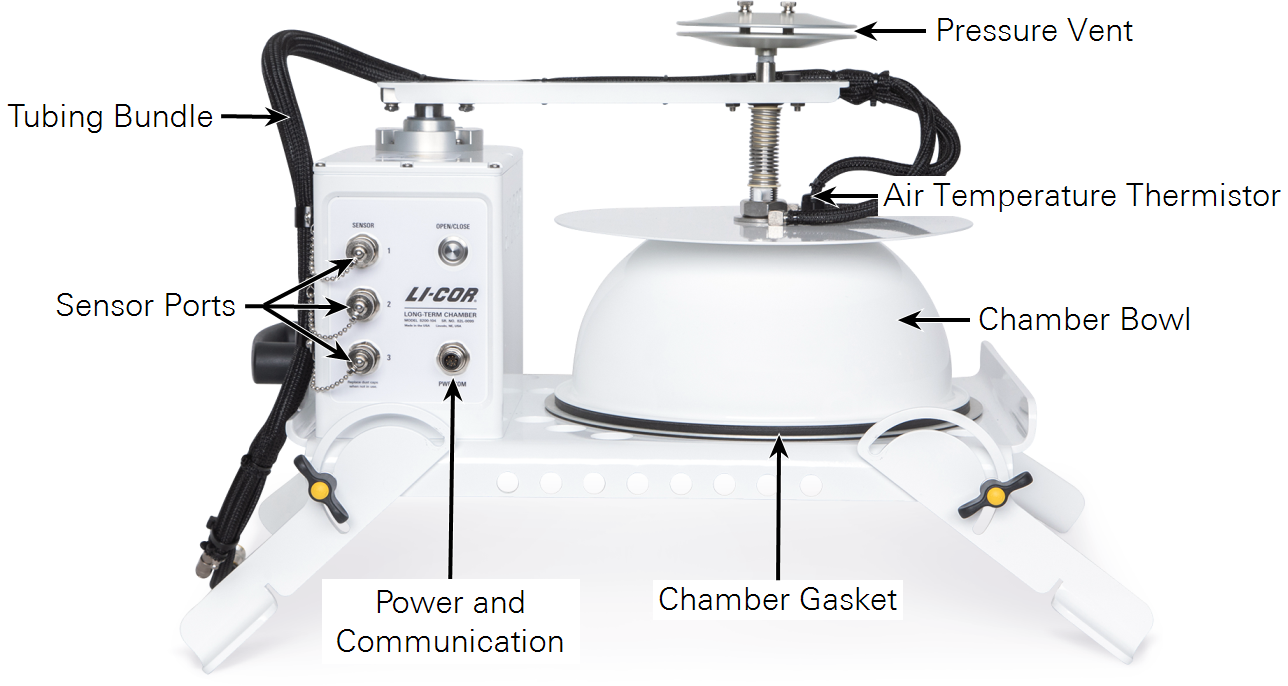
Connect the chamber sensor cable, tubes, and power/data cable.
The chamber sensor cable connects to one of the connectors on the chamber (Sensor). The Long-term Soil Chamber connects to the LI-8250 or 8250-01 Extension Manifold with a standard cable/tube bundle (9982-056).
-
Enter the collar height measurement into the chamber block on the Configuration page.
Each chamber block added to the system requires the collar height parameter.
-
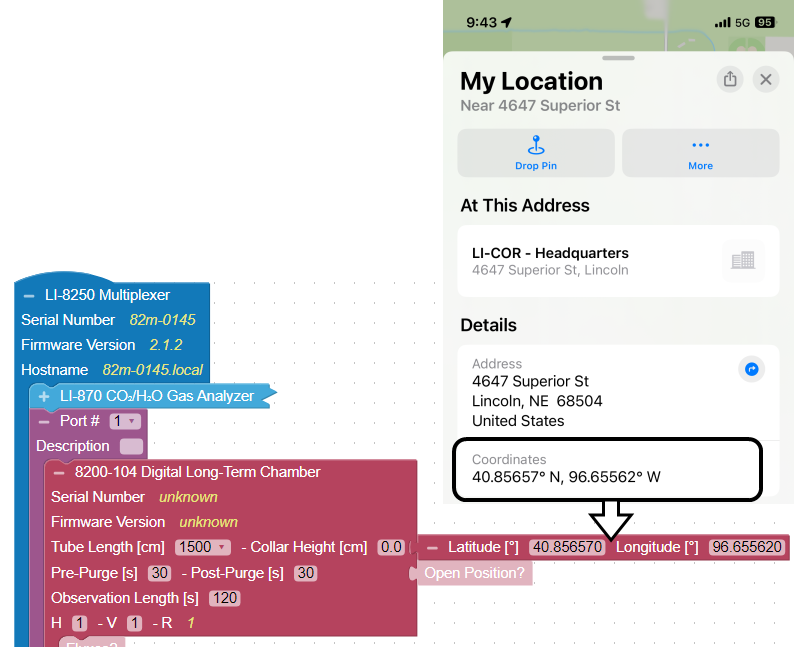
Enter the precise location of each collar (optional).
Your phone may be able to provide precise GPS coordinates for individual chambers using a map application. After noting the location, you can enter the information in the interface.
-
Set the open position.
Be sure there is sufficient clearance for the chamber arm and bowl to move to the open position. The default open position is rotated 180° from the closed position, but five other open positions ranging from 30° to 180° (Figure 3‑4) are available to avoid terrain or obstructions that interfere with the movement, including. Chamber open positions are set for each individual chamber in the software Configuration tab with the Open Position block.

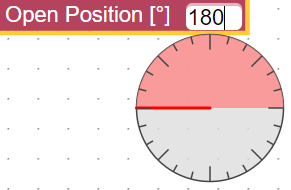
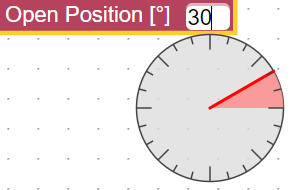
Figure 3‑4. Long-term chamber open positions (top) can be set in the software (bottom). -
Set the Maximum Temperature Increase.
Each chambers has an option to cancel the measurement and open the chamber if the temperature inside the chamber rises above starting temperature by a settable amount. This setting is useful to prevent overheating the sample. Changes >3° C are likely to alter the parameters being measured.
-
Connect and configure ancillary sensors.
This step can be completed when you are preparing for field deployment or while you are in the field. If you skipped or partially completed it earlier, be sure to finish. If you've already done it, skip ahead. See Using sensors with chambers for details.
Parking the chamber
You can manually change the position of the chamber using the OPEN/CLOSE button on the motor housing. This button has a few different uses but the most common use is to move the chamber into the park position. When in park, the chamber will raise slightly to prevent compressing the chamber gasket. This is the position you will want the long-term chamber in before transporting it, performing maintenance, or storing it.
To place the chamber into park, quickly press the OPEN/CLOSE button twice. If the chamber was open, it will first fully close and then it will raise to the park position.
The OPEN/CLOSE button has several functions:
- A single press will open or close the chamber.
- Two quick presses will park the chamber.
- Pressing and holding the button will move the chamber slowly in the opposite direction of its last movement.
Caution: Be sure to park the chamber before moving it, performing maintenance, or placing it in storage. Handling the chamber while it is not parked can damage the chamber.